Inside….Out

Inside….Out

Some may say this is a little late given that it’s almost August, but I say it’s actually the perfect time to do a little sprucing up of your outdoor living spaces (or create one if you haven’t!).   The end of summer marks several things – school starting back, football season right around the corner (yes…this girl from Alabama is doing her GameDay countdown along with the good people over at ESPN…), cooler weather coming soon, AND … “end of summer” sales.  This is the perfect chance to pick up a few things for your outdoor spaces on the cheap and have them ready to welcome in that fall weather (when it’s actually NICE to sit outside midday again…ha!).

The cardinal rule of outdoor living in my opinion is to “bring the indoors, out”.  Meaning, re-create the comforts of your living room on your porch, deck or patio.  Here are some of my few favorite ways to accomplish this…

1. Add drapes, rugs, and accessories (especially on screened porches).

This is one of the simplest and highest impact things you can do on a porch to give it a cozy, living room vibe.  Here’s an example below..

screen-shot-2017-07-26-at-6-41-40-pm1.png
Photo courtesy of Pinterest

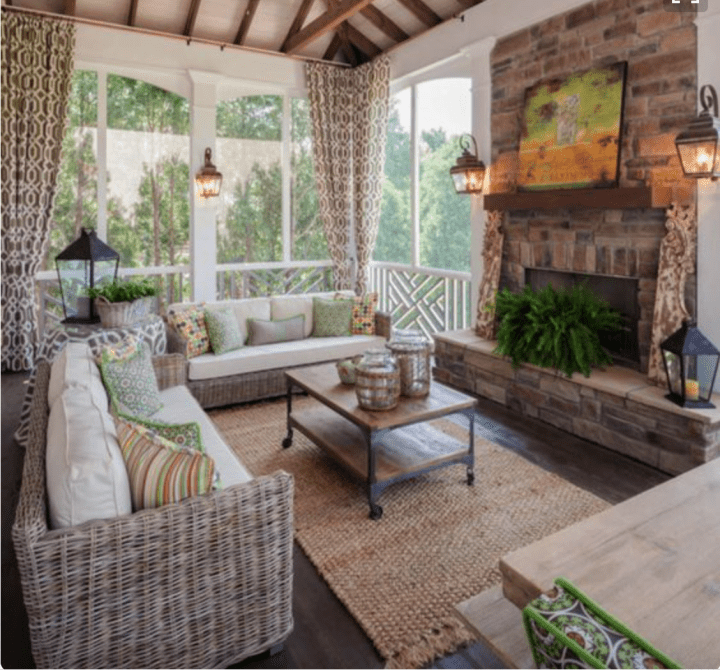
Notice how the drapes soften the corners of the porch and the natural fiber rug adds to   the “living room” feeling by adding softness to the floor.  The lanterns, sconces, and art also make it feel more like an extension of the living room.  Take all this away and you lose that coziness.   The drapes also serve a functional purpose as well on an outdoor porch – they can block the sunlight when needed.  (Crazy concept, I know, but true story…)

2.  Add color.  

Notice in the picture above how they added bright colors and patterns through throw pillows to, what would otherwise be a very neutral palette.  Bright colors WORK outside because of the all the natural light.  Not sure what colors to use?  Take the main colors in your house and use a slightly brighter version outdoors.  I promise, you will like the result.

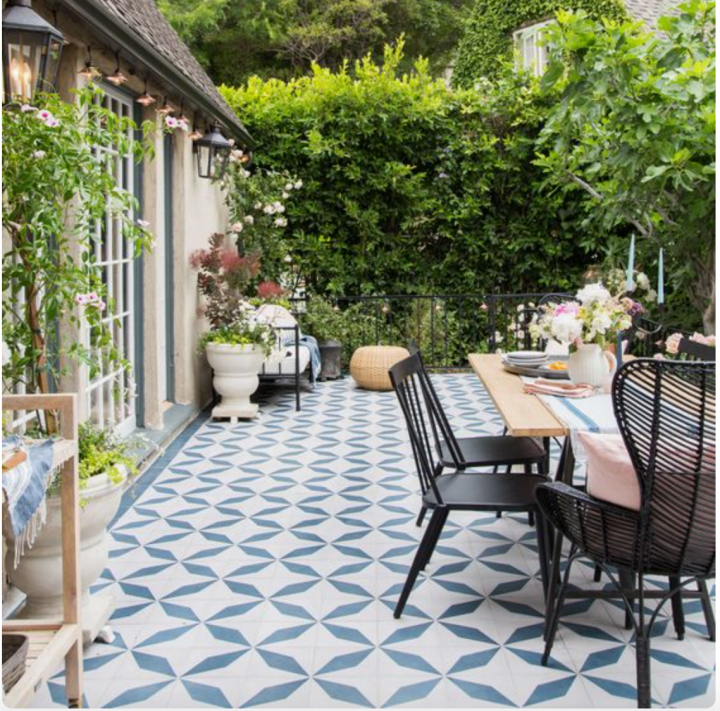
Another unique way to add color?  Tile a patio floor with a colorful tile… take a peek at how inviting that can be…


Screen Shot 2017-07-26 at 8.21.55 PM.png
Photo courtesy of Pinterest

Painting a wood ceiling on a porch a light blue is another great way to add interest and color.  Check this out… 


Screen Shot 2017-07-26 at 6.57.04 PM.png
Photo courtesy of Pinterest

This technique mimics the sky and gives you that feeling of a “sunny day, every day”.

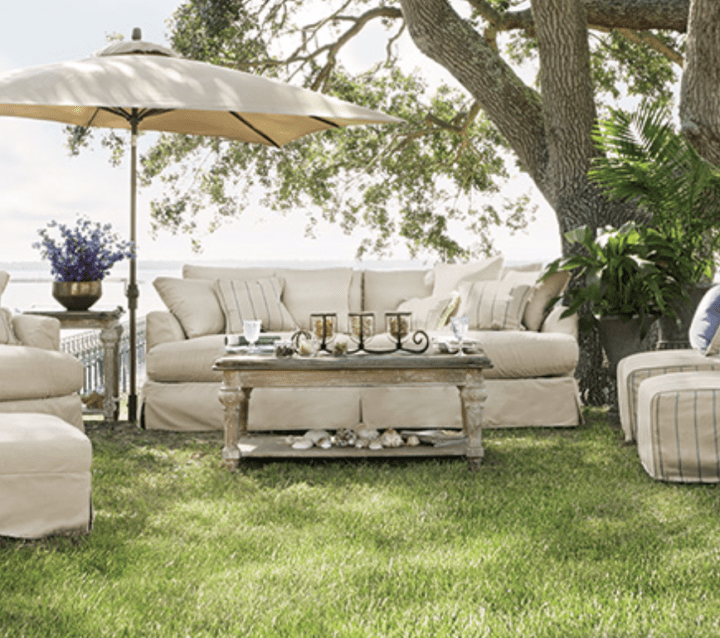
3. Don’t be afraid of upholstered furniture outdoors!

No longer does outdoor furniture have to be hard and uncomfortable.  Aside from being comfortable, an upholstered sofa or chair outdoors is the quintessential “indoors outside” look.  Just make sure you get pieces that were intentionally made for the outdoors (the construction allows for the pieces to breathe and the fabric resists mold, etc).

Screen Shot 2017-07-26 at 8.40.40 PM.png
Photo courtesy of Arhaus

Your outdoor space is an extension of your home and can add valuable living space that, if done right, will be enjoyed for years to come.  And if you have ever thought about doing some updating to your outdoor areas, now is a great time to act!   This fall when the weather is just too beautiful to stay inside, you will be glad you did.

The War of the Knobs – The devil is in the details…

The devil is truly in the details and this kitchen renovation has been no different.   I live for the details though…so game on!  It’s easy to do a basic gray and white kitchen, but the details are what will make it unique.  Up next? Cabinet Hardware…

Cabinet hardware comes in many shapes, forms, finishes, and price ranges.  So many options…  It’s also the “jewelry” of the kitchen so to speak, so I knew that while I wanted it to be simple, it needed to be substantial (in weight, feel, and look) and unique.  Did I mention there are SO MANY OPTIONS?  This little quest (that took WAY longer than I care to admit) quickly turned into something my husband lovingly called “The War of the Knobs”.   Here’s how it began…

The original cabinets had knobs on the cabinet doors and pulls on the drawers.  While they were nice, they didn’t speak to me on any level and had an orange/copper undertone to them that just didn’t work with the new kitchen design.  I knew that I wanted something that had some level of detail and that it couldn’t be too modern (so no simple straight bar pulls, etc).  Based on the overall feel and design of the rest of the house,  I also knew that it needed to be a dark finish (iron, black, very dark oil rubbed bronze, etc). I hit the web first to see what I could find, and (after an exhaustive search..) I narrowed my focus to simple knobs for the cabinets and pulls for the drawers.  I  came across designer Ashley Norton and fell in love with the unique designs and quality of the hardware.  I chose solid bronze twisted pulls (in varying lengths based on drawer width) for the drawers and simple knobs for the cabinets.  I chose the “dark bronze” finish which looks like a charcoal gray in person.  The finishes on this hardware will patina with use and show some of the underlying bronze over time.  Here’s a peek at a few of the options..

And just to give a glimpse of how I determined what length pulls to do on the different size drawers (and maybe give you a little glimpse of my brand of crazy…haha), I used tape. Yes, tape.  Blue painters tape to be exact..  I measured out the varying lengths and placed the tape on the drawers to see how it would look.  “Taping” it out is an easy way to get a visual and it can be used for this purpose, to get a visual on size of a new piece of furniture, etc.  Blue painter’s tape is not just for painting those edges….

Another detail for the cabinets was what to do with the glass panels that were in four of the doors (Keep? Do something more interesting? Ditch entirely and do solid doors?? OPTIONS…still…).  I was shown a picture by a custom furniture builder here in Greensboro of a job he had done previously.  He had used wire mesh panels in the doors in the place of glass.  YES!  I hit my computer and found numerous options (surprise surprise…) in varying finishes, sizes, styles, and prices on one of my favorite hardware sites (Van Dykes Restorers).  I went with a 1″ double round crimped version in an antiqued copper finish (given the fact that I had just selected solid bronze hardware that would eventually patina to show some of the bronze, and because my cabinet finish itself would have some distressing that would show some of the old cherry finish…). My initial thought was if the finish on the mesh was too bronze/copper I could put a little paint on it to make it work (it’s amazing what you can “adjust” with a little paint…).  When it arrived and I put it with the cabinet finish however, the color was spot on.  This is the mesh and the finished cabinet once installed…

We could talk details all day when it comes to renovations… but enough for now. As I mentioned earlier, it’s far easier to do a simple gray and white kitchen (as is all the rage right now), but by minding a few details you can find unique options to make your home your own.  It’s worth the effort.  Stay tuned ‘til next time to see the big reveal and for tips and ideas to stay on budget!

Before and After – Starring the Kitchen!! Part 1

The beginning of a new year often inspires us to make changes to things that weren’t working for us, whether that be in life or around our home.  The mark of this new year has inspired me to make some style changes to one of the main areas of my house that just wasn’t giving me that sense of calm we all need in our homes.  This area is the heart of our home and a place where I spend a lot of my time (especially with two small kids…).  I’m sure you guessed it by now – it’s the KITCHEN.

Over course of the next few weeks, I will be doing some “Before and After” blogs (because who doesn’t love a good “Before and After”??)  talking about what we are doing, the process, and how I selected the finishes.  I’m super excited about this project, so let’s get started!

Here’s some shots of my kitchen prior to any work being done…

First things first, the decision needed to be made as to whether to paint the existing cabinets or replace entirely.  In my case, my cabinets are not very old (only about 5 years old) and in good shape.  I also know an amazing custom painter (Nathan Wainscott – Inspire by Color) who can work wonders on cabinets, furniture, walls, etc.  After meeting with him, I knew this was the route I wanted to take to #1. save some money (new custom cabinetry can be very pricey) and #2. give me some creative wiggle room as to the finished product (as I knew he could tweak the paint color to match whatever I needed, distress the wood to really give it a rustic look, etc).  With this in my back pocket, I knew I needed to find an inspiration piece to be the base of my design (Tip…I love to find one item to be my “inspiration” piece to base the design around.  It could be something very simple like a fabric or specific color, or something bigger like a rug or a certain marble or granite.  Finding that one thing you love will give you a starting point, direction to go next, and keep you on track as you pull together more finishes).   I decided to hit the slab yards to work on finding stone for my counters.   After perusing a few different places, I spotted a marble I just could not get out of my head (pictured below).  This had become my inspiration piece.  And my challenge, as I needed to figure out a way to mix this with another stone to fit this in my budget.

marble-1

I love a good challenge though….  So, I hit the slab yards again and in my search, I found a steel gray granite in a leathered finish (pictured below) that worked beautifully with the marble.   I knew this specific granite color was a lower level granite (meaning, it is more commonly found and therefore significantly less expensive than other granites out there) and if I used this on the exterior counter tops, I might still be able to use the marble I loved so much as a focal point piece on my island.   When the quote came in I almost did cartwheels.  It was right on target with where I wanted to be budget wise.  First problem, solved. granite-1
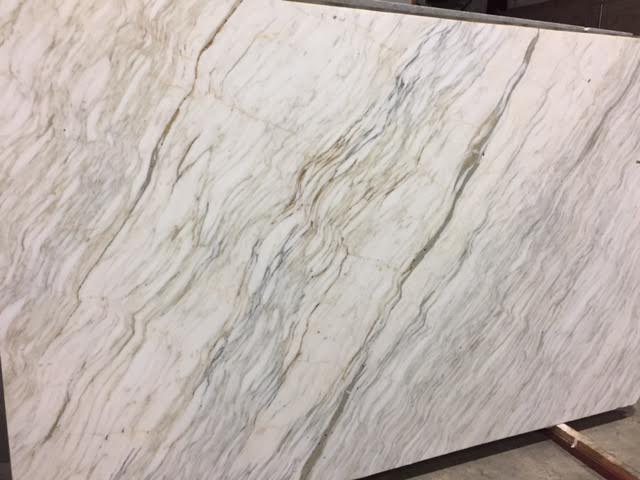
While the kitchen is still a work in progress, and these are not true “after” pictures yet (cabinets are still a work in progress…doors are off being refinished, so don’t mind the mess that would normally be behind closed doors…ha!), here’s a sneak peek of the new counters installed…  Stay tuned to the progress and our journey to an updated kitchen!

new-counters-2new-counters-1


Hazel LOVES a good sale…

Hope everyone had a wonderful holiday!!  I know this is the time of year where we are almost holiday’d out… too many parties, too many cookies, maybe a couple extra cocktails (guilty)…. BUT, this is the time to hit the sales and stock up on your decorations for next year while they are up to 60% off!  (YES… you read that right).

Hitting the sales are a great way to get those nice ornaments, decorations, or that super pretty ribbon at a fraction of the price.  Most places will have all their Christmas inventory on sale starting after Christmas (with some starting their sales before!).    I hit a few places this morning here in Greensboro, NC and found some fantastic deals on some very nice ornaments and ribbon.  Take a peek!  All were 60% off (with a couple of individual ornaments I purchased being under $4 each!!).

This slideshow requires JavaScript.

All of the items pictured were found at local businesses.  Not in Greensboro?  There are deals everywhere.  Here are a few items on sale at my favorite design store in Birmingham, AL (Rosegate Design)…  They are offering 50% off Christmas items.

Can’t get out this week?  Don’t fret – online shopping is easier than ever and there are deals to be had at most online retailers.  A few of my favorites are… Balsam Hill (http://www.balsamhill.com/), Frontgate (http://www.frontgate.com/holiday-decor/?) and Restoration Hardware (https://www.restorationhardware.com/).  While not the only ones by a long stretch, all of these retailers have quality items that normally are more expensive and by waiting until after Christmas you are able to purchase some of these items at a fraction of the regular price.

I hope you can take advantage of some of these bargains and get some great things to spice up your holiday decor for next year!  Now, get out and shop!!